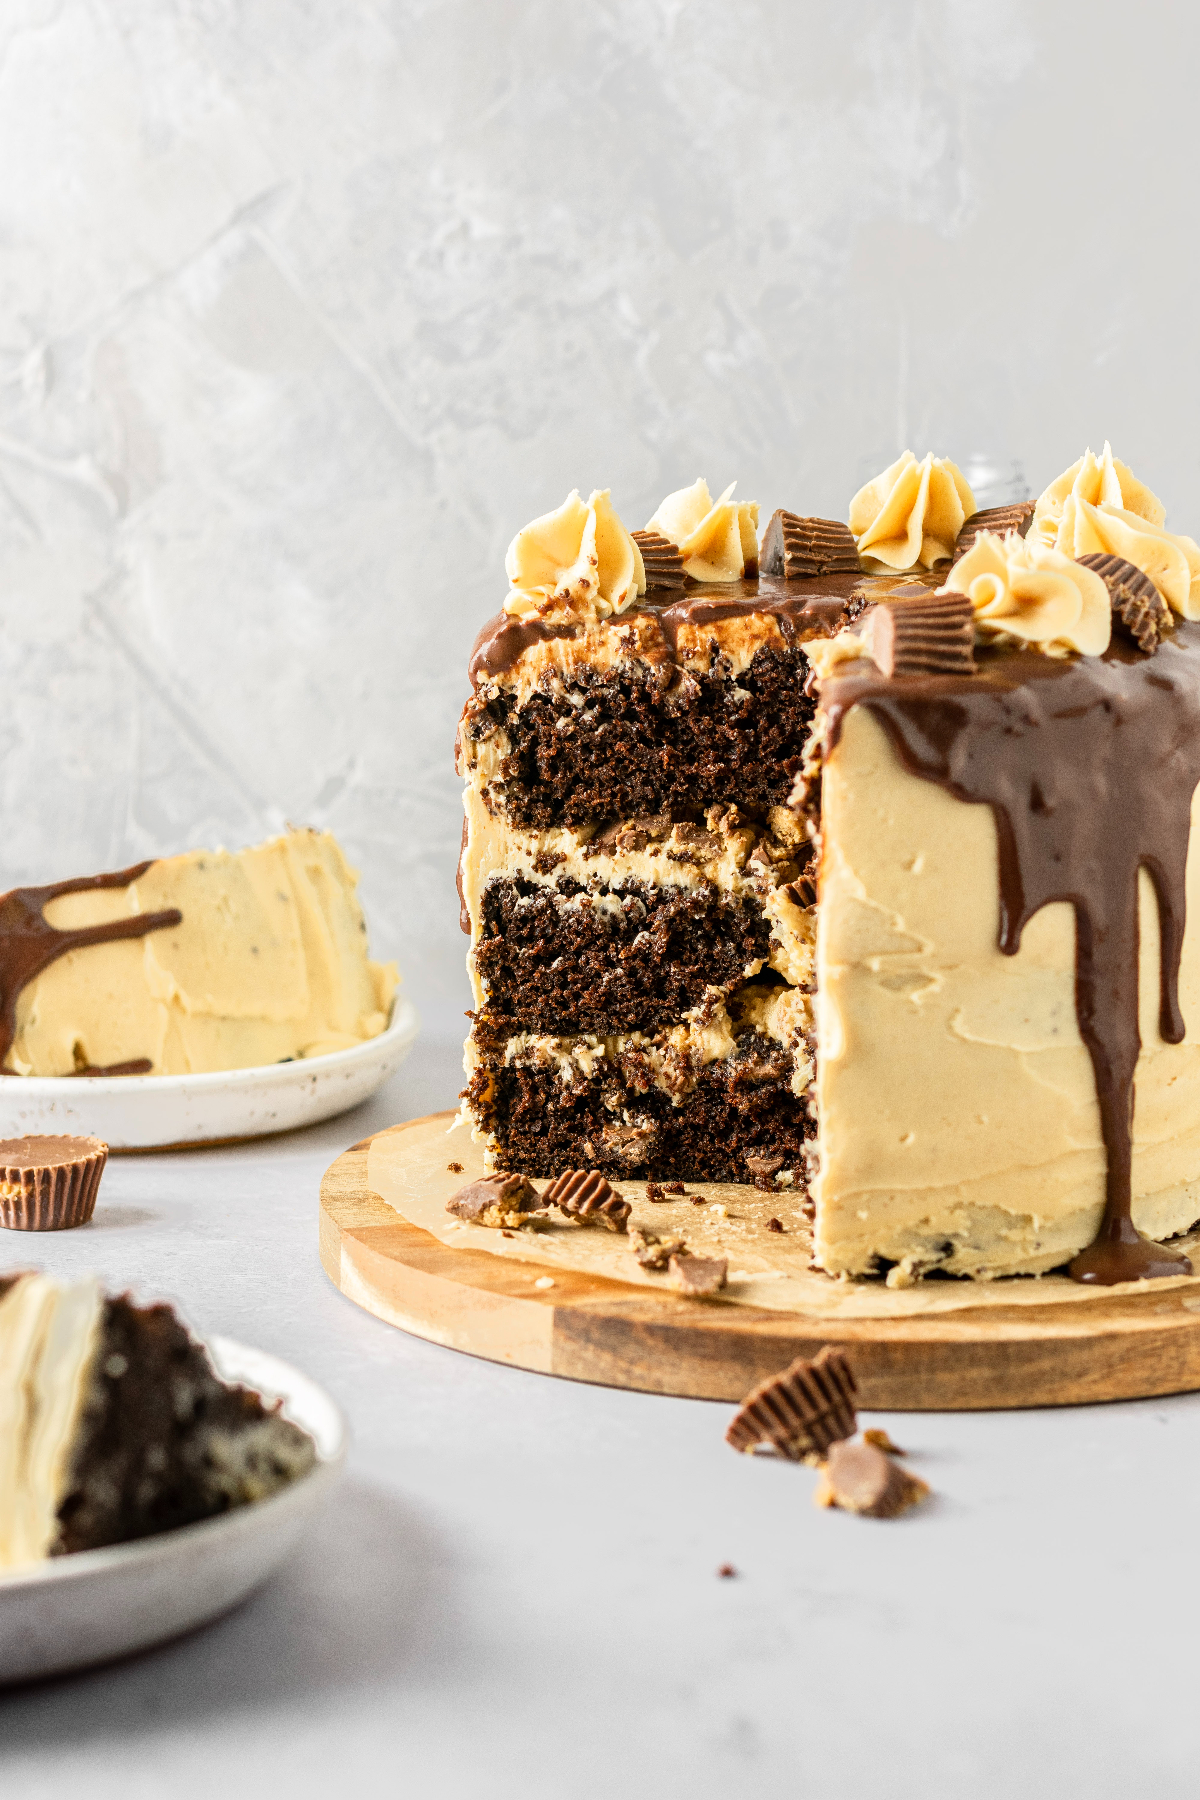
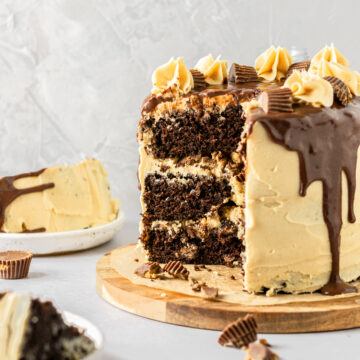
This Reese's Peanut Butter cake features a moist and rich chocolate cake, a creamy peanut butter frosting, and plenty of chopped peanut butter cups. If you are a Reese's lover like myself, you need to make this cake!

This chocolate Reese's cake is everything you love about that iconic candy bar: a deep chocolate flavor and smooth peanut butter. I also added a semi-sweet chocolate drip that tastes exactly like the chocolate coating on the outside of a peanut butter cup!
Craving more chocolate recipes? Then check out these: chocolate Oreo cupcakes, dark chocolate brownies, and mocha Reese's cookies.
Jump to:

Why You'll Love This Cake
- The chocolate flavor is fudgy and decadent.
- It combines both chocolate and peanut butter.
- The peanut butter buttercream is silky smooth.
- It tastes exactly like a Reese's peanut butter cup.
- Each bite just melts in your mouth!
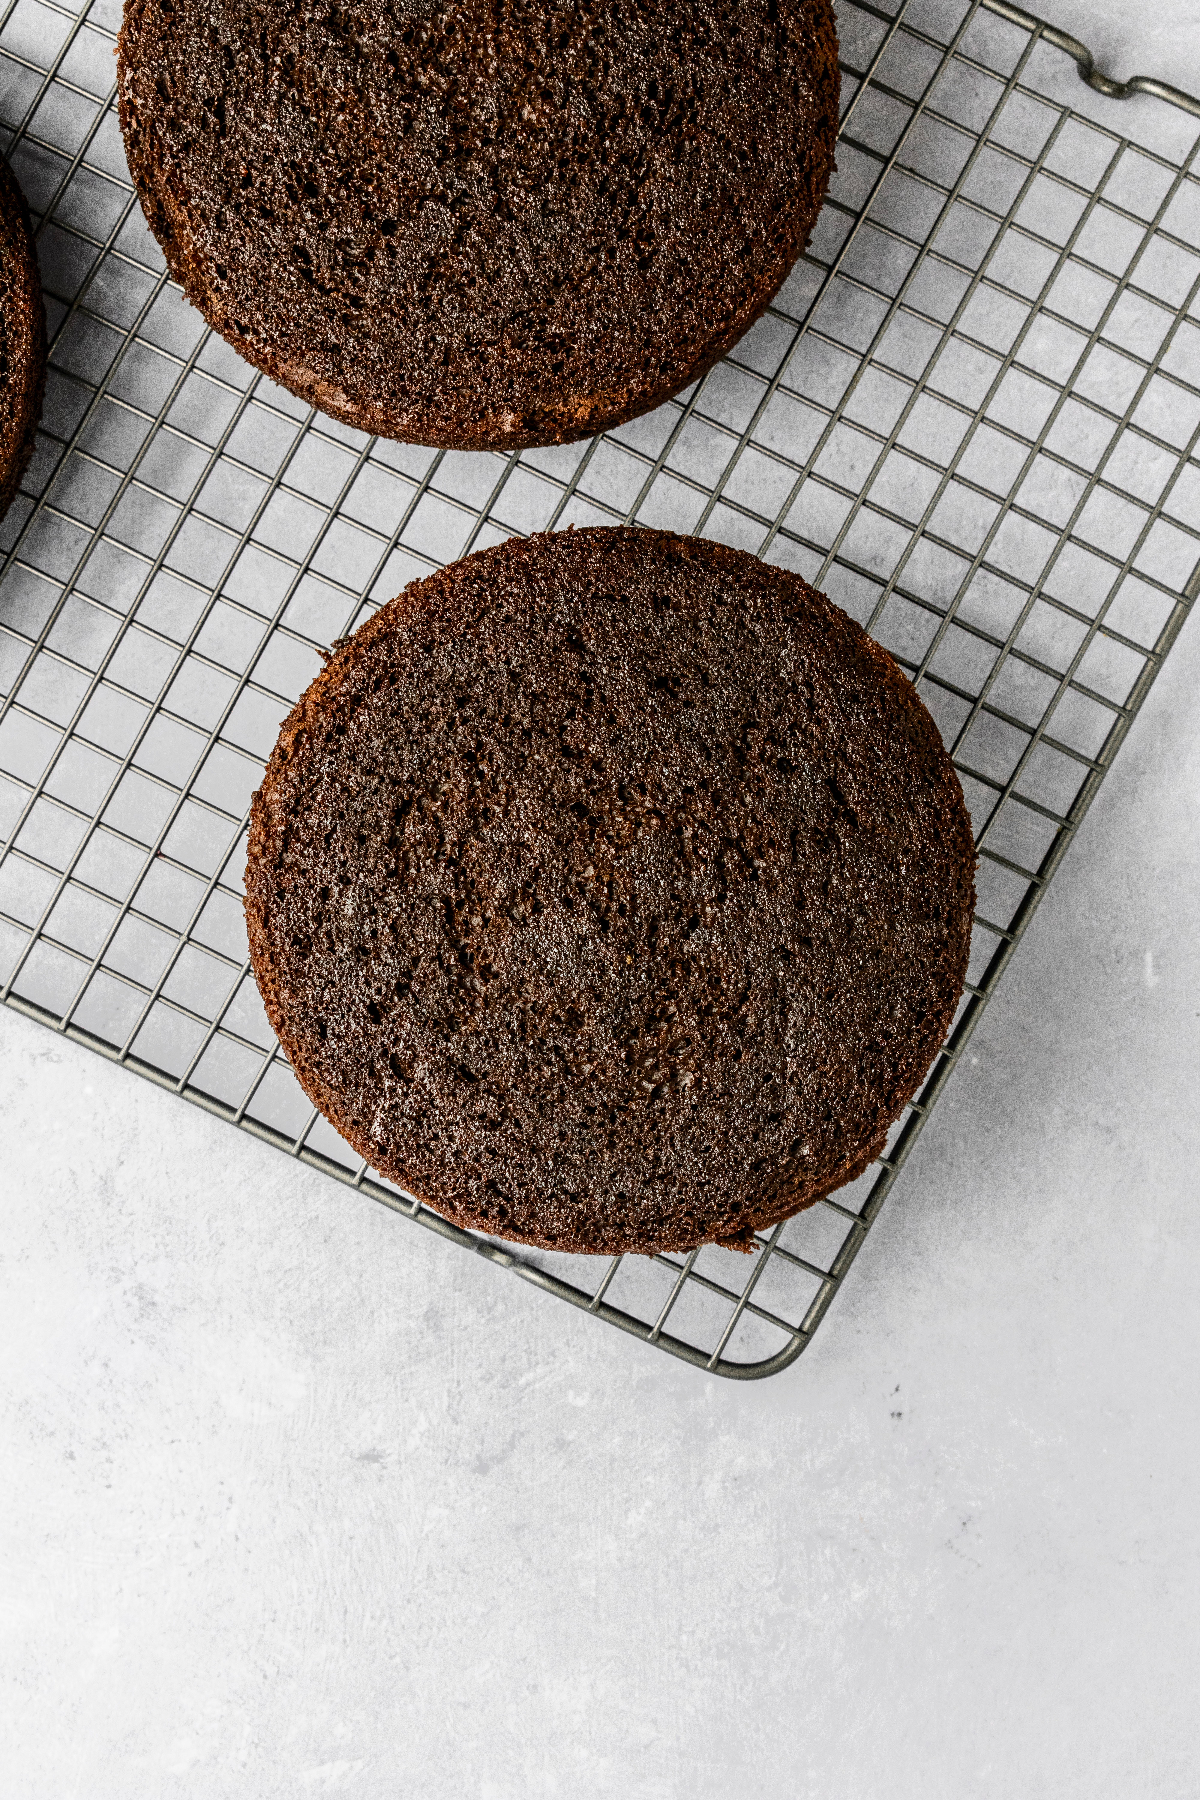
I used my best chocolate cake recipe for the layers, so they are super soft, fluffy, and chocolatey.
In between each layer I added chopped miniature peanut butter cups and even added more to the top of the cake. If you love peanut butter chocolate flavored desserts, then this cake is a must-bake!
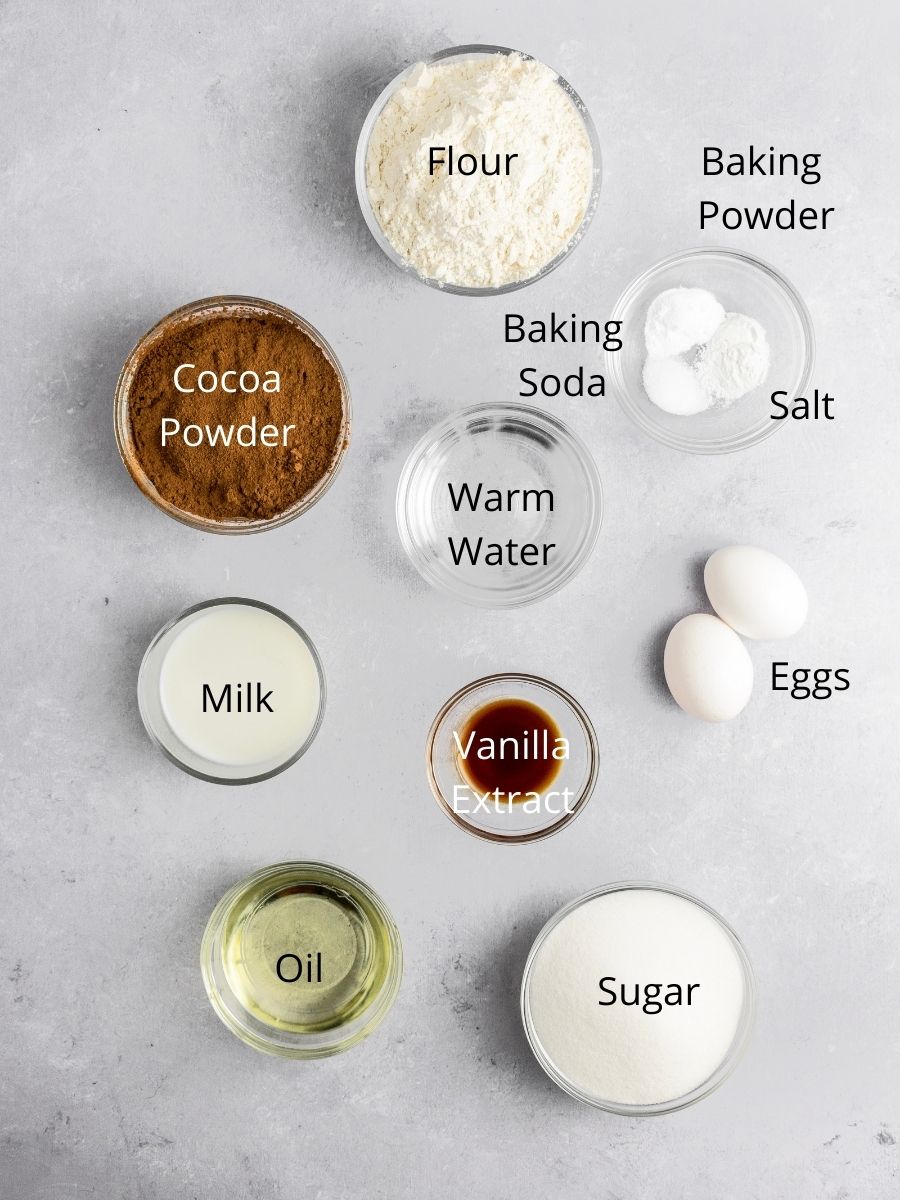
Ingredients Needed
Here are some notes on the ingredients we'll be using. For the full ingredients list, look at the recipe card below.
- Cocoa Powder: I used Hershey's natural unsweetened cocoa powder. Make sure to sift the cocoa powder before using.
- Leavening Agents: Both baking soda and baking powder are used.
- Milk: I used 2% milk, but you can use whatever milk you prefer.
- Oil: You can use either vegetable or canola oil.
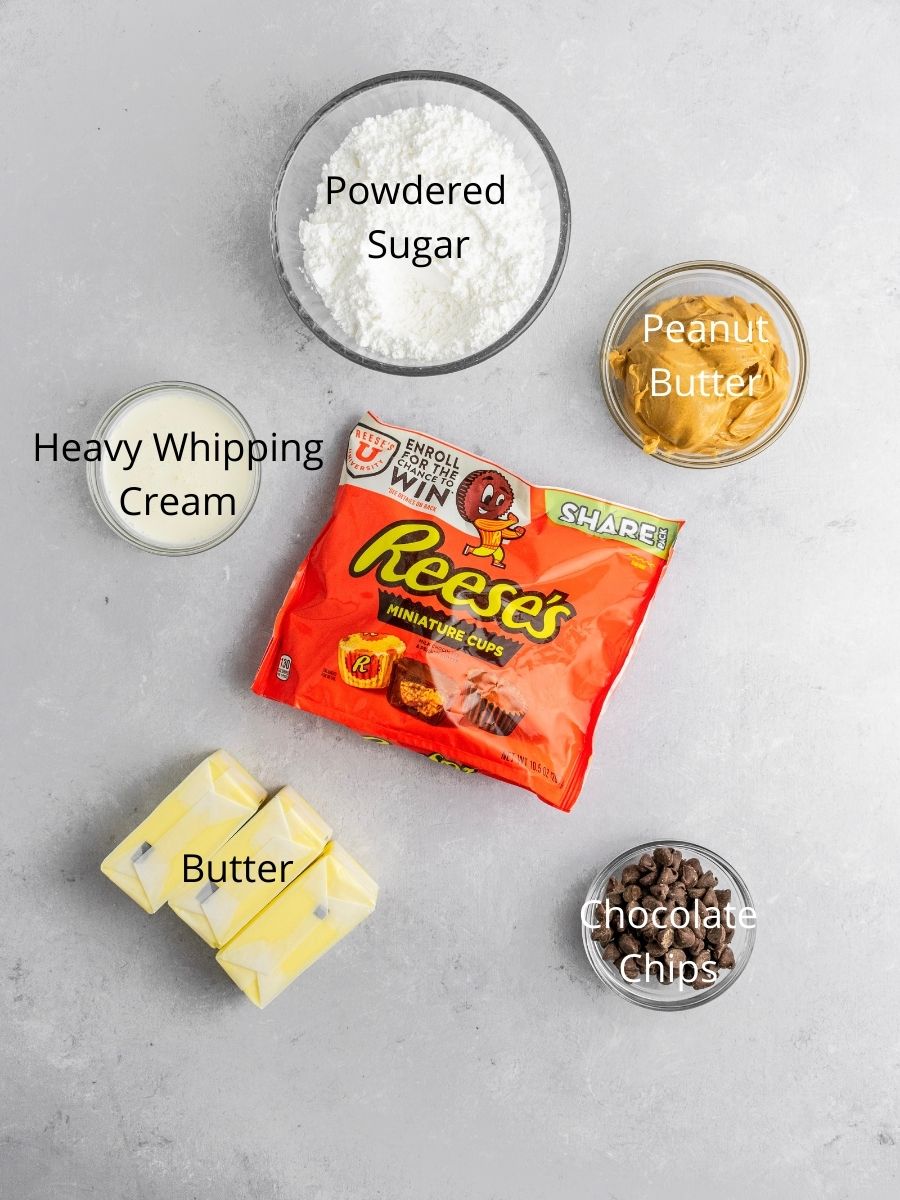
- Reese's: You'll need 20 miniature peanut butter cups.
- Peanut Butter: I recommend using creamy peanut butter so the buttercream can be as smooth as possible.
- Chocolate Chips: Use semi-sweet chocolate chips for the ganache. This makes it taste just like the outer coating of a peanut butter cup.
- Heavy Whipping Cream: This is used to make the ganache.
Instructions
Here are the step by step instructions on how to make this peanut butter chocolate cake.
Step 1: Dry ingredients. In a large bowl, whisk together the flour, cocoa powder, sugar, baking soda, baking powder, and salt.
Step 2: Wet ingredients. In a medium-sized mixing bowl, whisk together the warm water, milk, eggs, vegetable oil, and vanilla extract until combined.
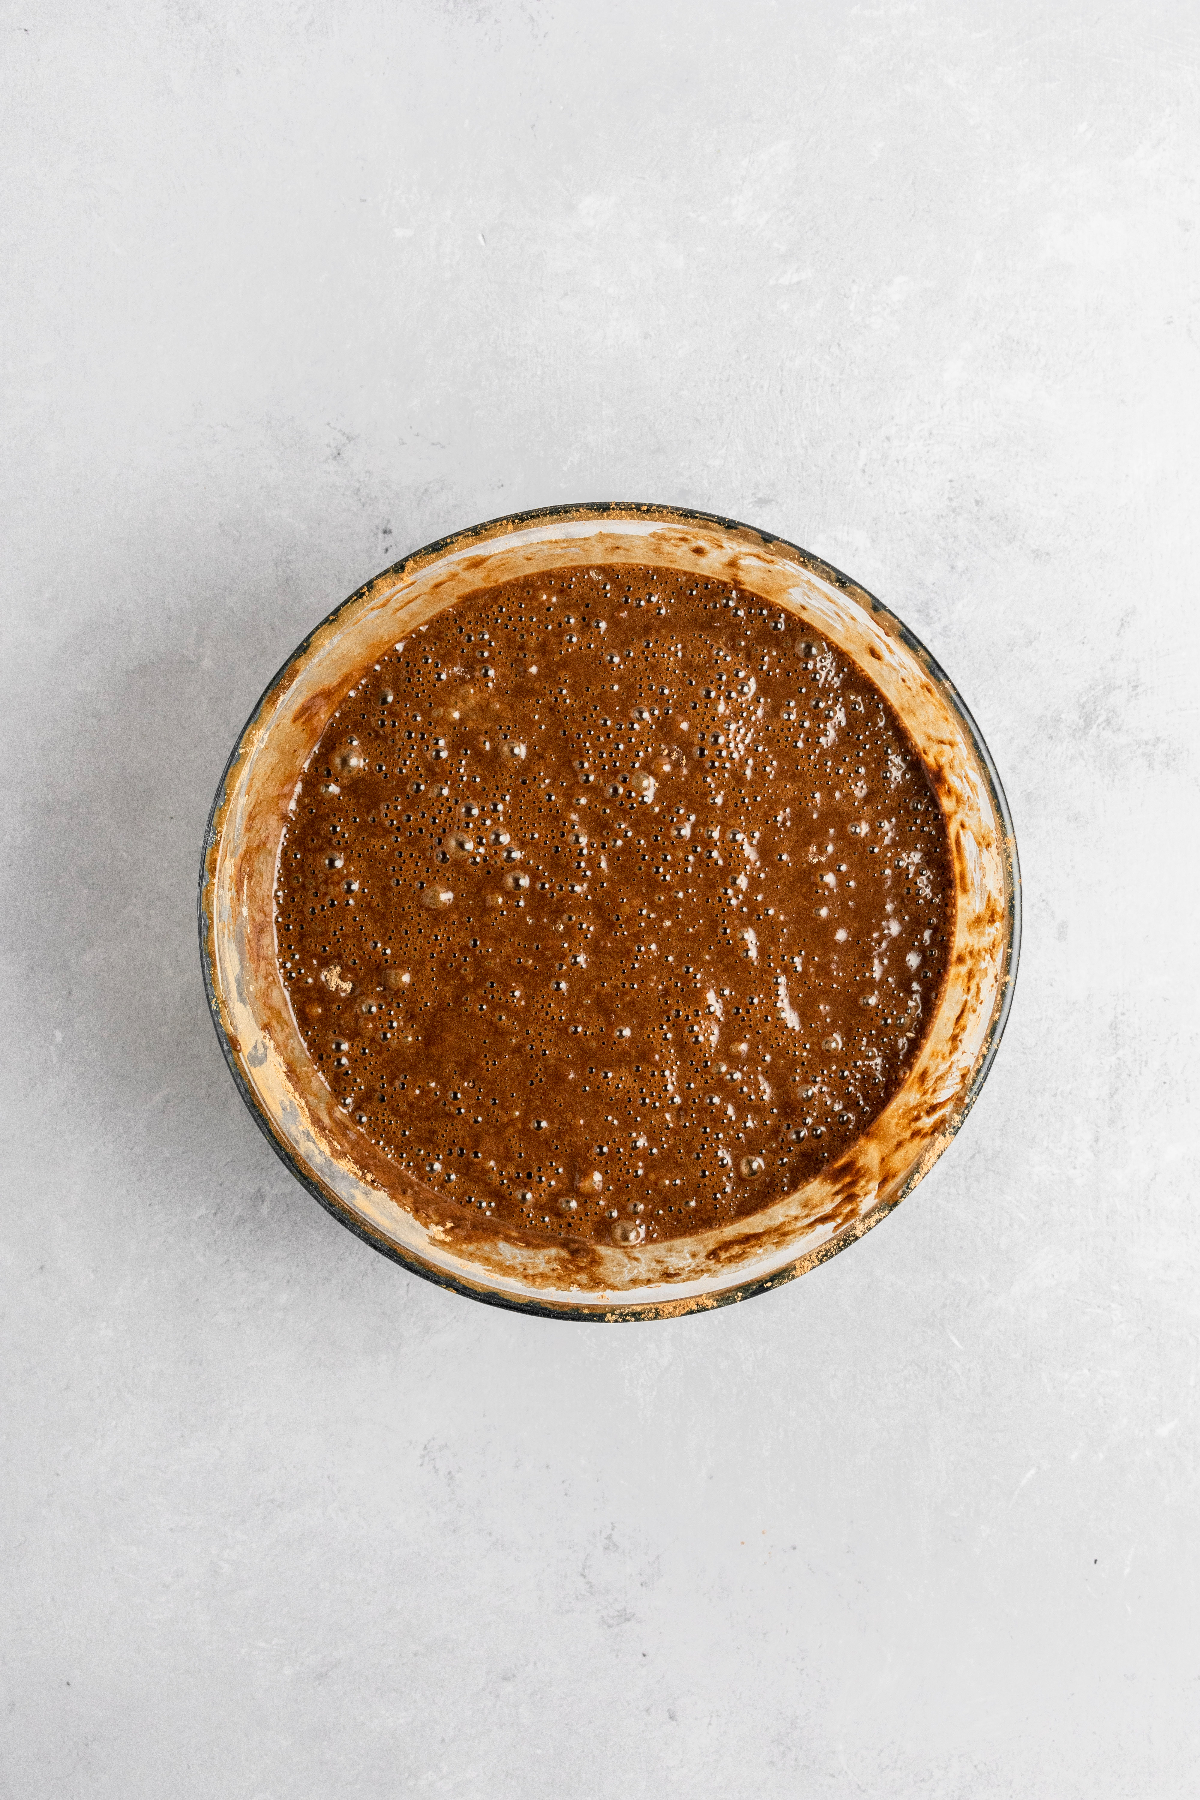
Step 3: Combine the ingredients. Slowly add the wet ingredients into the dry, whisking until a wet batter forms.
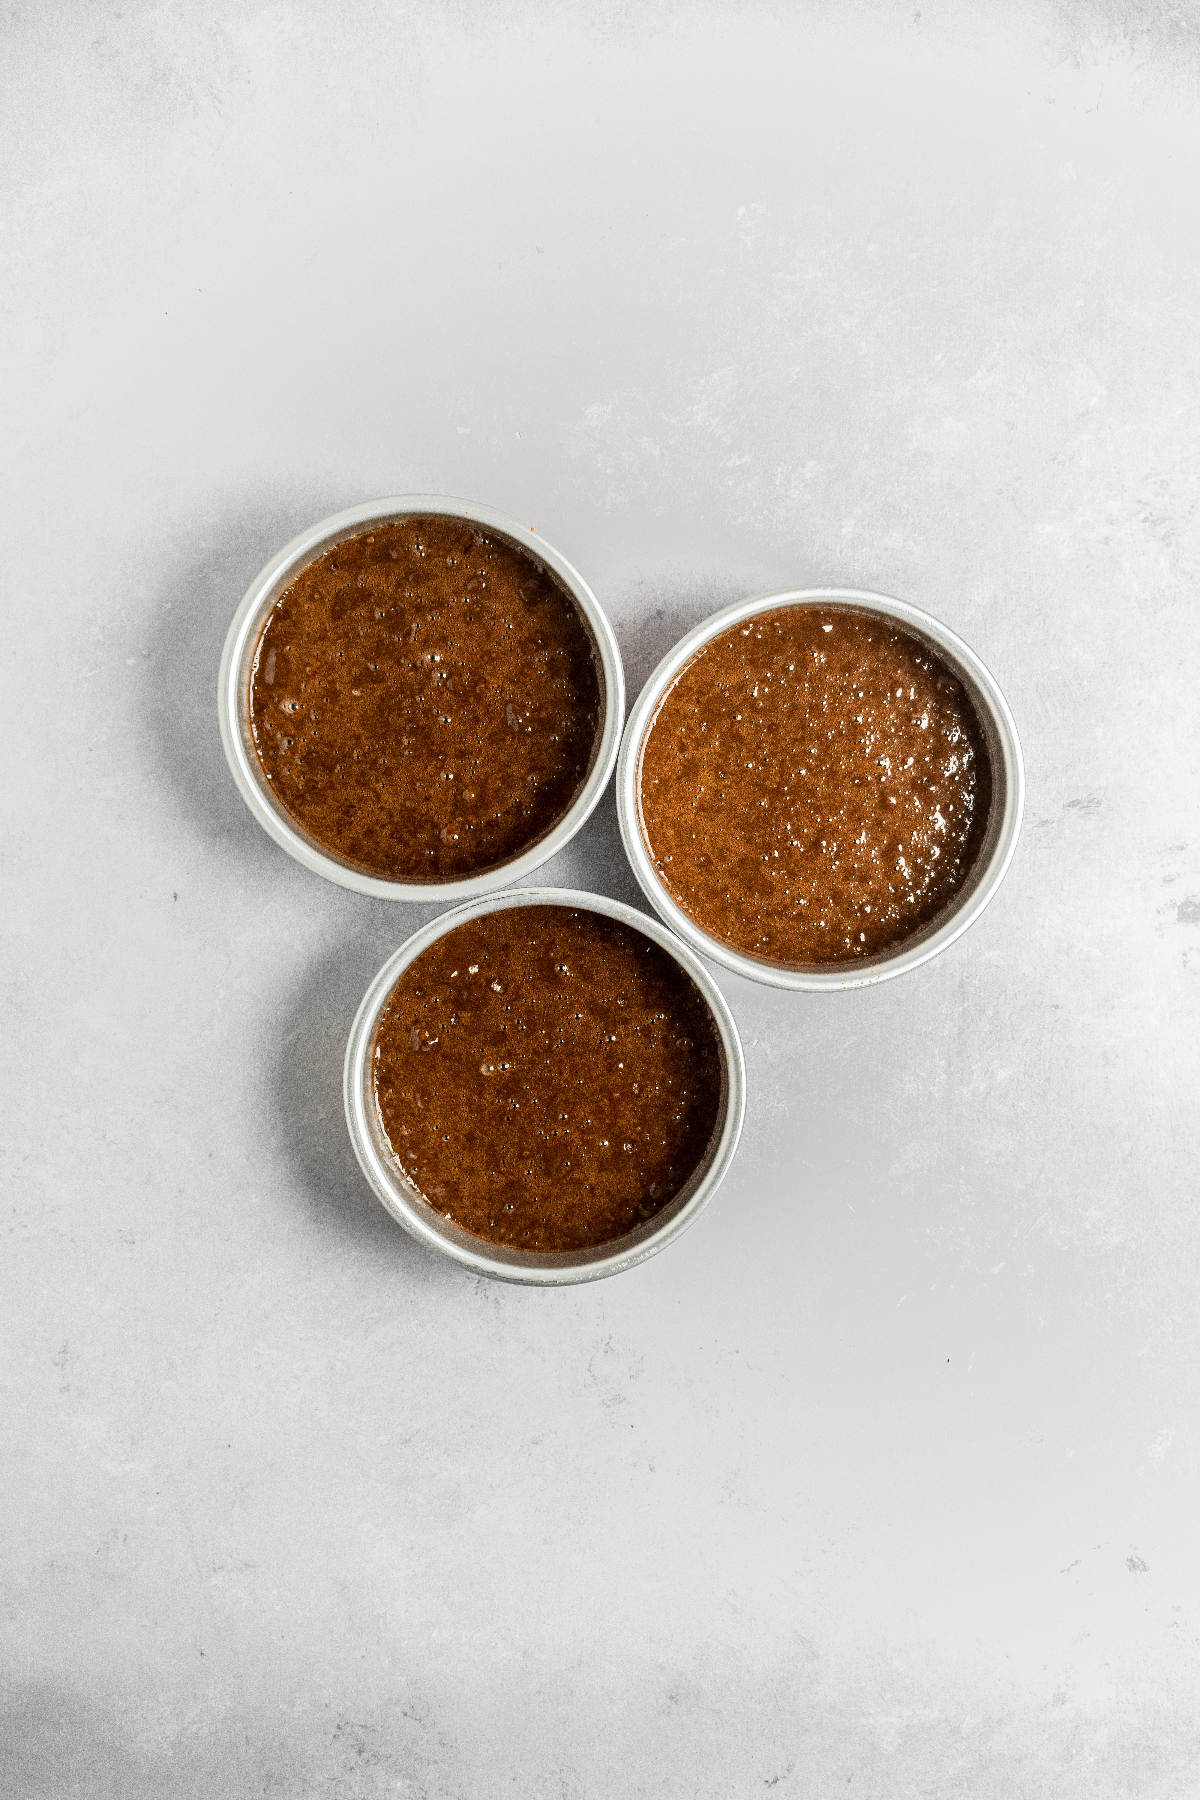
Step 4: Bake. Divide the batter amongst the three prepared cake pans and bake for 23-28 minutes, or until a toothpick inserted into the middle of the cakes come out clean.
Step 5: Make the frosting. Beat together the butter and peanut butter until light and creamy using an electric stand mixer. Add the powdered sugar and vanilla extract and mix on low until combined. Then beat on high for 1-2 minutes until creamy.

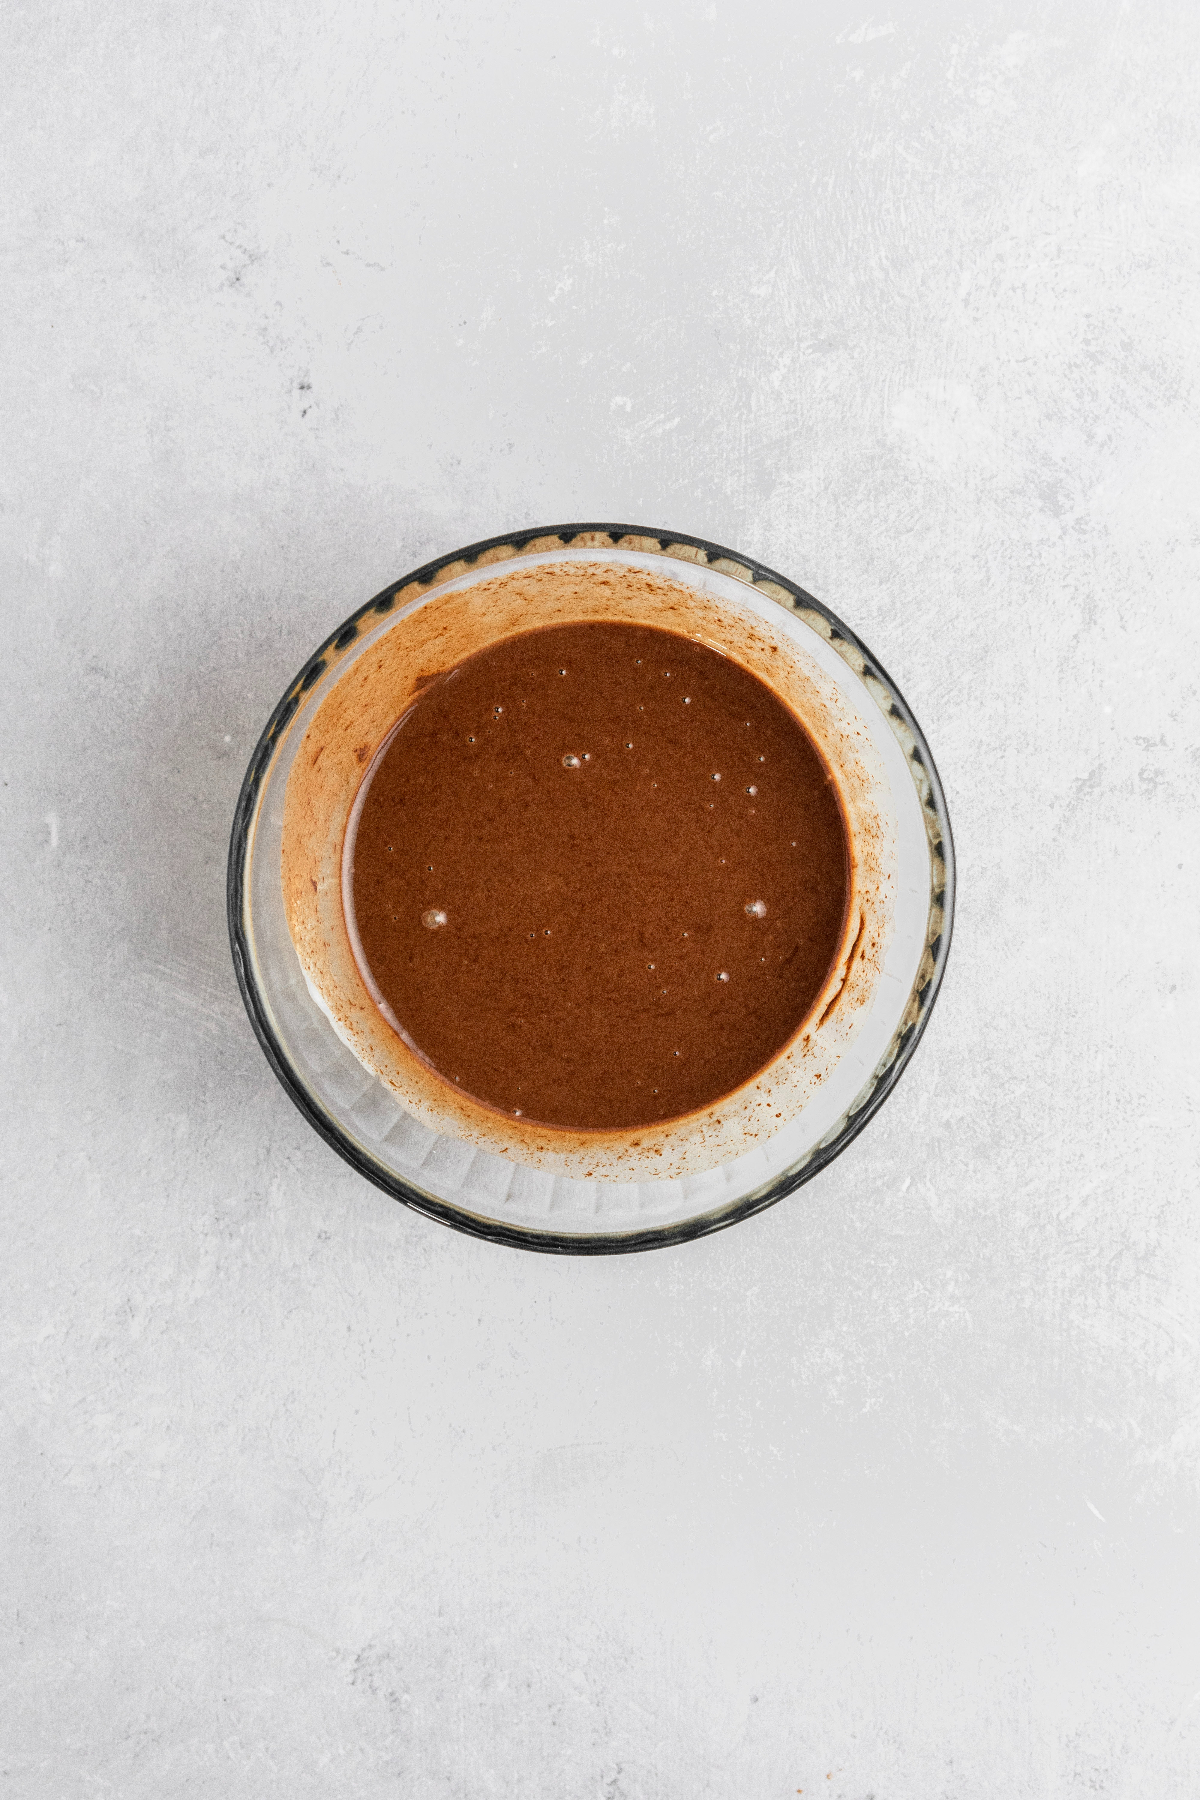
Step 6: Make the ganache. In a microwaveable-safe bowl, heat the heavy whipping cream until bubbling. Pour the heavy cream into the chocolate chips and allow it to sit for 3 minutes, then whisk together until smooth. Cool to room temperature.
Assembling The Cake
Make sure the cake layers are completely cooled before assembling and decorating.
First, level off the tops of each cake layer to create a flat surface using a serrated knife. Place one cake layer on a cake stand or plate and spread about ⅔ cup of frosting (I use my offset spatula to make it easier).
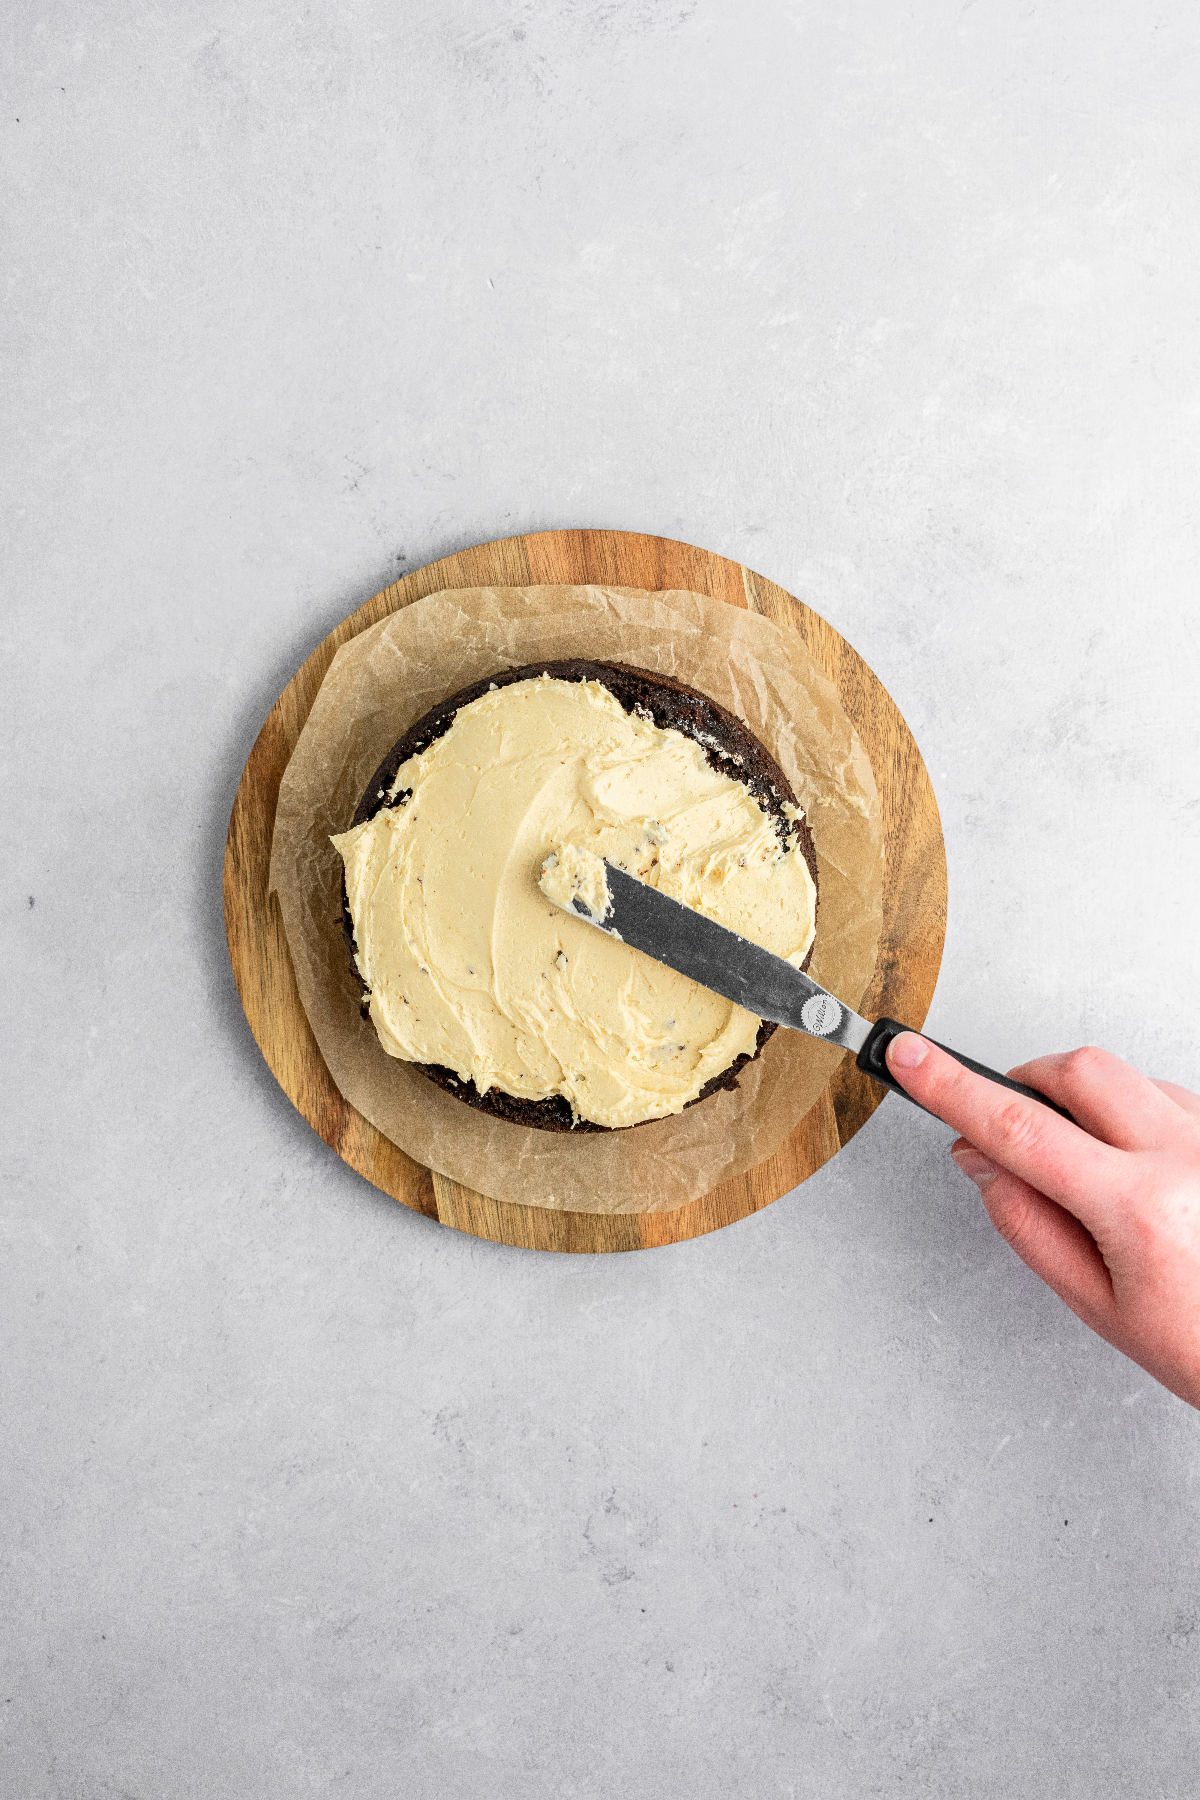
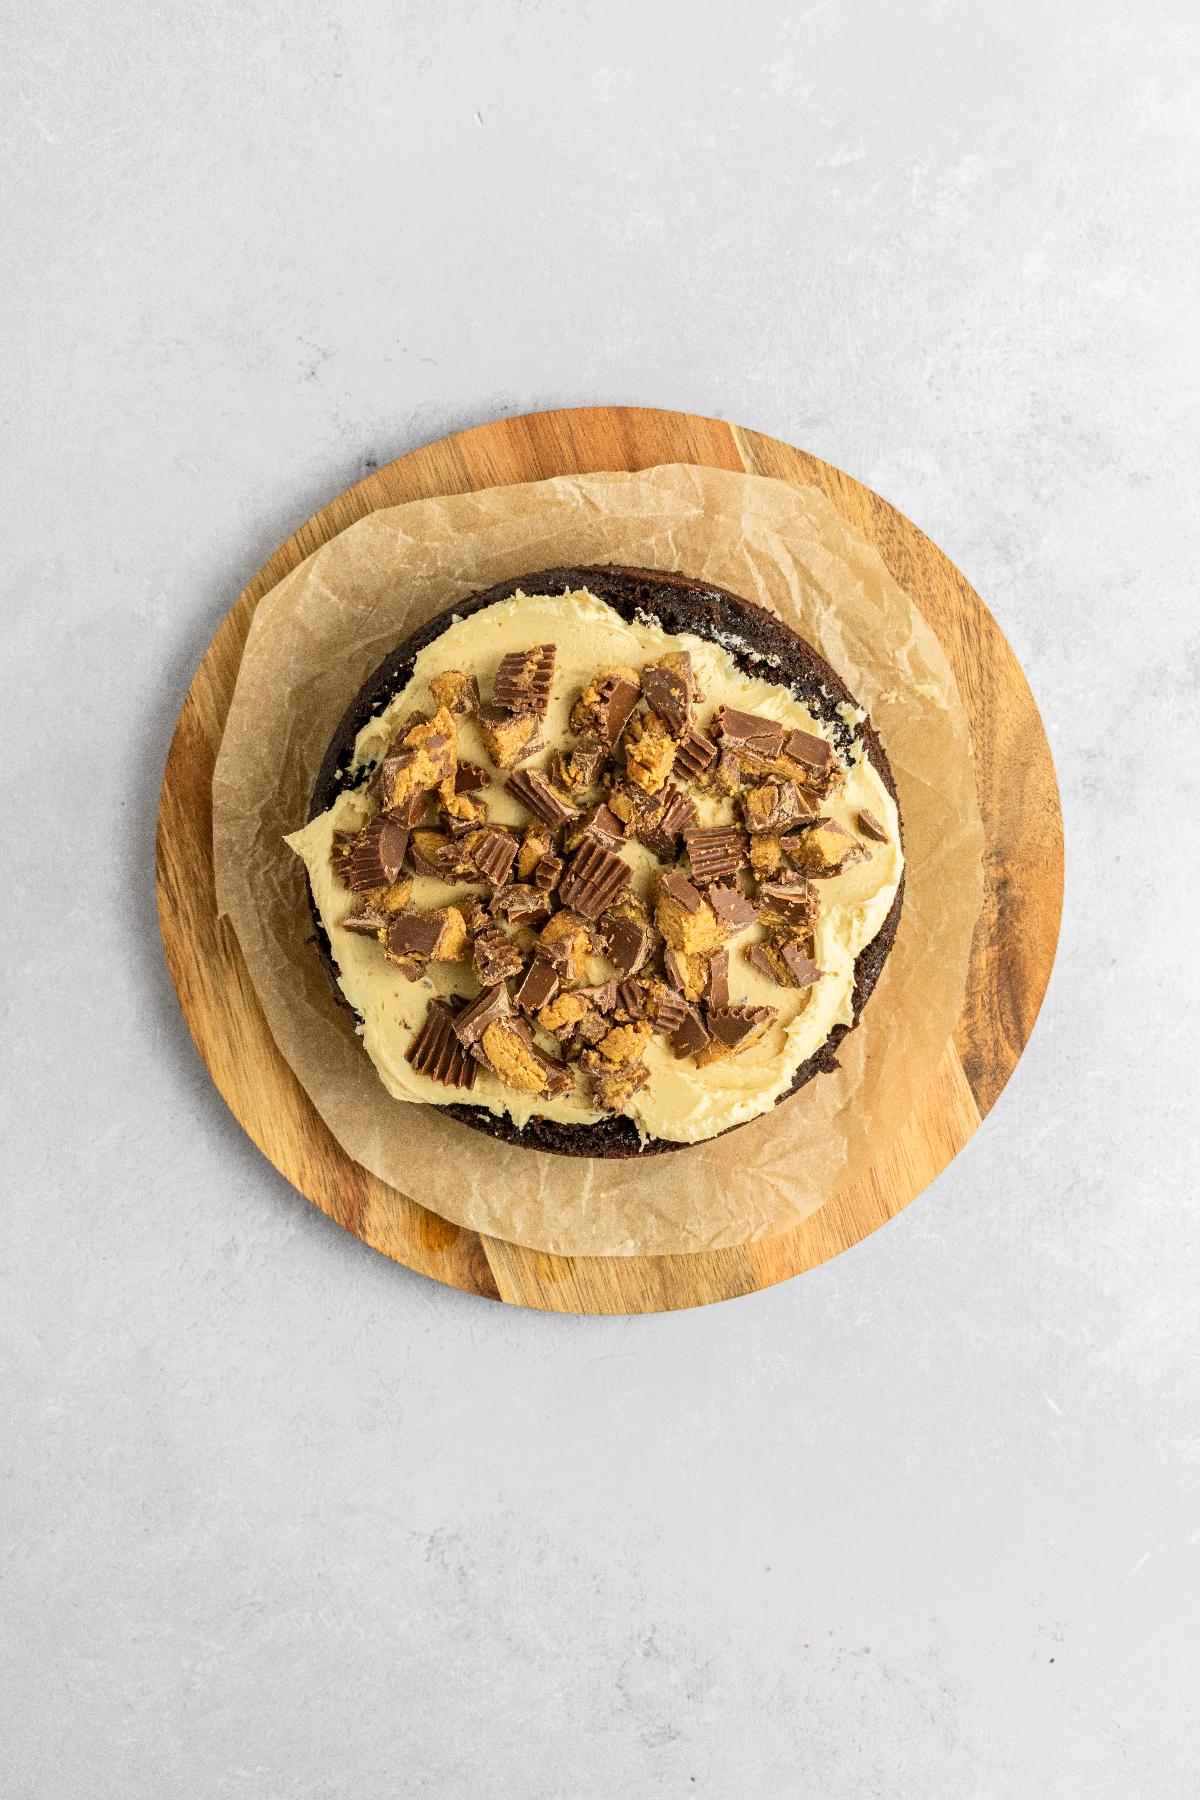
Add 8 chopped up mini peanut butter cups. Repeat with the second layer. Top the cake with the last layer and spread on about ¼ cup of frosting.
Next, frost and smooth the outside of the cake with a thin crumb coat. Place the entire cake in the refrigerator or freezer for 10 minutes to chill.
Finish frosting the cake with the remaining buttercream, pour on the chocolate ganache, and top with extra peanut butter cups.
Storage Tips
Keep any leftover cake slices in an airtight container in the refrigerator for up to 5 days.
You could also wrap each individual cake slice in plastic wrap before placing it into the refrigerator. This helps the cake to not dry out.
Expert Baking Tips
- Cake Pans: For this recipe, I used three 6-inch cake pans, but you could also use two 8-inch or two 9-inch cake pans (the baking time may be different). Prepare each cake pan by lining them with parchment paper and then non-stick spray.
- Measuring Flour: To help ensure you don’t add extra flour, follow these three simple steps: 1) Fluff up the flour using a fork. 2) Spoon the flour into your measuring cup. 3) Scrape a knife across the top of the measuring cup to level out the flour.
- Crumb Coat: This is where we add a thin layer of frosting on the cake in order to catch the crumbs and keeps them secure. You’ll want to chill the cake in the refrigerator or freezer for 10 minutes after the crumb coat has been put on before the final frosting layer.
- Peanut Butter Cups: In total, you'll need 20 miniature Reese's cups for this cake.
Recipe FAQs
Check out my chocolate cupcakes with peanut butter frosting to get the cupcake version of this Reese's cake!
I used three 6-inch cake pans, but you could also use two 8-inch or two 9-inch cake pans.
You'll need 20 miniature Reese's peanut butter cups.

If you made this recipe, please leave a comment and star rating below. I love hearing from you! Also, please tag me on Instagram and check out my Pinterest for even more recipe ideas.
It brings me so much joy to see you make my recipes. 🙂
Happy Baking!
More Cake Recipes To Try
📖 Recipe
Reese's Peanut Butter Cake
Equipment
- Three 6-Inch Cake Pans
- Mixing Bowls
- Electric Stand Mixer
- Whisk
Ingredients:
Chocolate Cake
- 1 ¾ cups all-purpose flour
- ¾ cup cocoa powder, sifted
- 1 ½ cups sugar
- 1 teaspoon baking soda
- 1 teaspoon baking powder
- ½ teaspoon salt
- 1 cup warm water
- 1 cup milk, room temperature
- 2 large eggs, room temperature
- ⅓ cup vegetable oil
- 1 ½ teaspoon vanilla extract
- 20 miniature Reese's peanut butter cups
Peanut Butter Frosting
- 1 ½ cups unsalted butter, room temperature (3 sticks)
- ¾ cup creamy peanut butter
- 3 ½ cups powdered sugar
- 1 teaspoon vanilla extract
Chocolate Ganache
- ½ cup semi-sweet chocolate chips
- ½ cup heavy whipping cream
Instructions:
- Preheat the oven to 350 degrees and line three 6-inch cake pans with parchment paper then nonstick spray. Set aside.
Chocolate Cake
- Whisk together the flour, cocoa powder, sugar, baking soda, baking powder, and salt in a large bowl. Set aside.
- In a medium-sized mixing bowl, whisk together the warm water, milk, eggs, vegetable oil, and vanilla extract until combined. Slowly add the wet ingredients into the dry, whisking until a wet batter forms (do not overmix).
- Divide the batter amongst the three prepared cake pans and bake for 23-28 minutes, or until a toothpick inserted into the middle of the cakes come out clean. Let the cakes cool in the pan for 15 minutes before removing and placing them on a wire rack to cool completely.
Peanut Butter Frosting
- In the bowl of an electric stand mixer using the paddle attachent, cream together the butter and peanut butter on med-high speed until light and creamy (2-3 minutes). Add the powdered sugar and vanilla extract and mix on low speed until combined. Then beat on high speed for 1-2 minutes until smooth and creamy.
Chocolate Ganache:
- In a small bowl, add the chocolate chips. Set aside. In a microwaveable-safe bowl, heat the heavy whipping cream until bubbling (30-45 seconds). Pour the heavy cream into the chocolate chips and allow it to sit for 3 minutes, then whisk together until smooth. Cool to room temperature.
Assemble
- If needed, use a serrated knife to level off the tops of each cake layer to create a flat surface. Place one cake layer on a cake stand or plate and spread about ⅔ cup of frosting. Then top with 8 miniature peanut butter cups that have been chopped up.
- Repeat with the second layer. Top the cake with the last layer and spread on about ¼ cup of frosting. Frost and smooth the outside of the cake with a thin crumb coat. Place the entire cake in the refrigerator or freezer for 10 minutes to chill.
- Remove the cake from the refrigerator and finish frosting with the remaining buttercream. Cover the sides and top of the cake again until frosted to your desire (use a cake scraper for a smooth finish).
- Pour the chocolate ganache over the top of the cake, allowing it to drip down the sides. I used the Wilton 1M piping tip to decorate the top of the cake, along with more miniature peanut butter cups that have been cut in half.
- Refrigerate the cake for at least 15 minutes before serving so it's easier to cut. Keep any leftover cake slices in an airtight container in the refrigerator for up to 5 days.
Notes:
Nutrition


My daughter loves the white chocolate reese cups, have you ever tried making with those?
I have not but oh my goodness that sounds amazing!! If you end up trying it PLEASE let me know how the cake turns out!
This is our favorite cake. Made it with gluten free flour and using 3 teaspoons of vinegar to replace each egg. Turned out so delicious! My in laws were impressed :). Highly recommend making this recipe and it’s forgiving for food allergy modifications!
Yay! I'm so glad to hear how much you love this cake, Louie. 🙂
This may be the best cake I have ever made! I made it for a family birthday party a few weeks ago, and everyone was amazed. Today is my husband's birthday, and he asked me to make the same cake and "he would eat it for dinner". He only got one piece at the family party, and he wanted to have another taste of this beautiful cake! I followed the recipe, using two 9" pans, and I added some crushed heath bar bits both in the middle and the top, in addition to the Reeses cups (my husband's favorite) and everyone loved it! Thanks for a great recipe! This one will be used often in my family.
Hi Renee! Thank you so much for your sweet comment! I'm so happy to hear that this cake was well received by your family and husband!! I love the idea of adding Heath bits to it too!!
This is the best cake my husband and I have ever had in our lives! And that is saying something because he loves cake. SO perfectly rich and balanced with the peanut butter and chocolate flavors. If you’re considering making this cake just do it, you will not regret it!!
Yay! I'm so glad this cake has become one of your favorites 🙂
This cake was so easy to make! It was soooooo delicious!!!!! Hubby and kiddos LOVED it!
Yay! I'm so happy to hear that, Abbie 🙂
If i did it with 2 9 inch round pans everything would still be the same right? I'd just divide the cake batter into the 2 pans evenly?
Hi Kelly! Yes, that is correct. Just divide the cake batter between your 2 9-inch cake pans. Just note that the bake time may be different so keep a close watch on the cake as it bakes. Let me know how it turns out!
Wow! That’s definitely something I want to try! Thanks for sharing.
OH MY GOODNESS, this looks so amazing!! 😍😍 Your friend must’ve been reallllyyy grateful to have such a delectable and gorgeous birthday cake. Can’t wait to try that recipe myself!
Thanks for the lovely comment, Garett!