This homemade apple pie recipe is simple and delicious to make. Paired with a flaky all butter pie crust and a sweet apple filling, any home baker can conquer this American classic pie!

Homemade pies are such a comforting dessert. They go great with any occasion, such as birthdays, picnics, BBQ's, and even work parties. And let us not forget the holidays!
No matter the time of year, you can't go wrong with baking up and serving a pie, especially an American classic such as apple pie.
Sometimes it can feel like a daunting task to make a homemade pie and pie dough from scratch. But I want you to feel confident that you (yes, you!) can easily create this homemade apple pie within your kitchen.
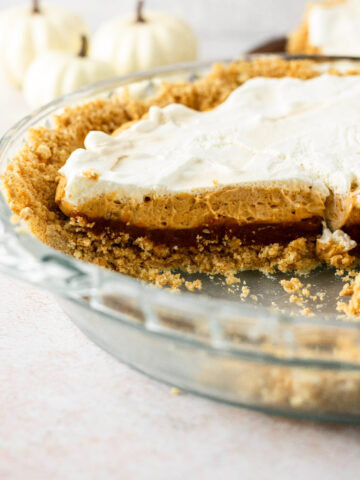
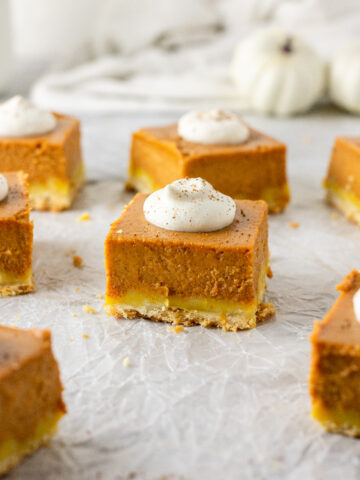
I also have these mini apple pies and this graham cracker crust apple pie recipe that you'd also love.
What Apples Should I Use For A Homemade Apple Pie?
This is always the question when it comes to making apple pie, isn't it? Which apples are best or which should I use? We all have our own tastes and flavors we like best, and apples are no exception.
Some of us like super sweet apples, or tart, or the kind that's crisp and holds it's crispness even when baked. Let me tell you the two types of apples I like to bake with the most.
Granny Smith Apples. They're tart and have a beautiful green color. I love to use Granny Smith apples when baking because when combined with a sweeter apple the flavors pair so deliciously together.
Honey Crisp Apples. These apples are sweet in flavor and have a nice crisp texture (hence the name, honey crisp). Honey Crisp apples plus Granny Smiths are my favorite apples to use when baking, especially together. The Granny Smiths offer the tartness flavor while Honey Crisps give you the texture and sweetness you desire.
Now, those two apples are certainly not the only kinds of apples you can use in your homemade apple pie. Others include:
- Golden Delicious
- Fuji
- Gala
You choose which apples you like best and combine them to make your own apple pie. 🙂

To Peel Or Not To Peel The Apple Skins?
In my personal baking opinion, this all depends on you and whether or not you like the taste and texture of apple skins. When creating this recipe I tried it with both the skins peeled and left on.
For me, it made no difference in how the pie filling baked or the texture of the apples. Peeling the skins off is time-consuming and if it doesn't make a difference to the overall taste or texture to the pie, then I'm leaving the skins on.
Plus, leaving the apple skins on not only gives good nutritional value (be sure to wash your apples first before slicing) but also they're beautiful.

Tips Before Starting:
- Cold Butter: It's very important that our butter is as cold as possible when making the pie crust. Cut your butter into cubes and place back into the fridge until ready to use.

- Ice Water: I do literally mean ice water. Take a normal drinking cup and fill it with water. Place 3-4 ice cubes into the cup. We will then use tablespoons to measure out our ice water as we add it to the pie dough.
- Chilled Pie Dough: Once you finish making your pie dough, wrap each disk of dough with saran wrap and place into the refrigerator. By the time you get the other components ready to make the pie, your dough should be chilled enough to use. This helps the gluten in your pie dough to relax, which will actually make it easier to roll out later.
- Baking Sheet: Once your pie is filled in the pie pan, place it on a baking sheet before placing it into the oven. Since this is an all butter pie crust it can make a bit of a mess in your oven as it starts to bake because the butter drips. I learned the hard way my first time by not placing the pie pan on a baking sheet. So skip the mess and use a baking sheet!
- Baking Temperatures: We will start off by baking at 375 degrees for 20 minutes. This will start the browning process on the top of the pie crust. Then we will turn the temperature down to 350 degrees and bake for 40-45 minutes. The reason we turn the temperature down is so that the crust doesn't over cook as the filling is baking.
- Cooling Pie: Allow the pie to cool for 3 hours after being taken out of the oven. The pie needs this time to rest and for the filling to solidify more as it comes to room temperature. Trust me, it's worth the wait!
Ingredients In Homemade Apple Pie
Flaky All Butter Pie Crust:
- All-purpose flour
- Salt
- Unsalted butter, chilled and cubed
- Ice water
Apple Pie Filling:
- Apples, cored, peeled (optional), and sliced into ¼ inch slices
- Lemon juice
- All-purpose flour
- Cinnamon
- Nutmeg
- Ginger
- Brown sugar
- Sugar
- Vanilla extract
- Egg white (used for an egg white wash)
How To Make Homemade Apple Pie
- Flaky All Butter Pie Crust: Either in a bowl using a pastry cutter or a food processor (I used a food processor), combine flour and salt. Add the cubes of butter and press the pulse button on the food processor 4-6 times until the mixture resembles coarse crumbs (or use your pastry cutter).

- Add 2 tablespoon of ice water at a time, pulsing (or mixing with a wooden spoon) 2-3 times before adding 2 more tablespoons. The dough will start to feel slightly sticky and large clumps will form. That's when you know to stop adding the ice water. I add anywhere between 6-10 tbsp.
- On a lightly floured surface, press and fold the dough a few times until a ball starts to form. Cut the dough in half and flatten each piece into a disk shape. Wrap up in saran wrap and place both pie doughs into the refrigerator to chill for later.

- Apple Pie Filling: Preheat the oven to 375 degrees. Core, peel (optional), and slice your apples into ¼ inch slices. In a large bowl, stir together the sliced apples, lemon juice, flour, cinnamon, nutmeg, ginger, brown sugar, sugar, and vanilla extract. Set aside.
- On a lightly floured surface, roll out one of the pie doughs, turning the dough slightly each time until a circle forms. We want about an 11 to 12-inch circle diameter. Place the dough into your 9-inch pie pan, carefully letting the excess pie dough hang over the sides (we will cut off later). Spoon the apple filling into the crust, leaving the extra juices in the bowl.

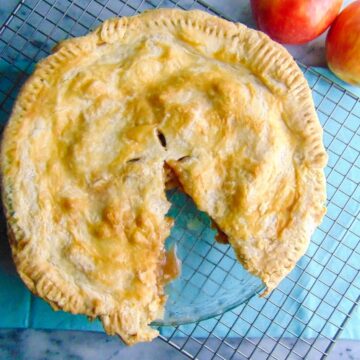
- Take the other pie dough out of the fridge and roll out into another 11 to 12-inch circle. Place the dough over the filling. With a small paring knife, carefully cut off the excess pie dough. Use either a fork or your fingers to seal the pie dough shut. Then cut little slits in the middle of the pie for the steam to vent out of when baking.

I used a fork to seal this pie crust, but you can also use your fingers. Be creative with how you want your pie to look!
- Lightly brush the top of the pie dough with your egg white wash. Place pie pan onto a baking sheet and place it in the oven. Bake at 375 degrees for 20 minutes, then turn the temperature down to 350 degrees and bake for an additional 40-45 minutes.
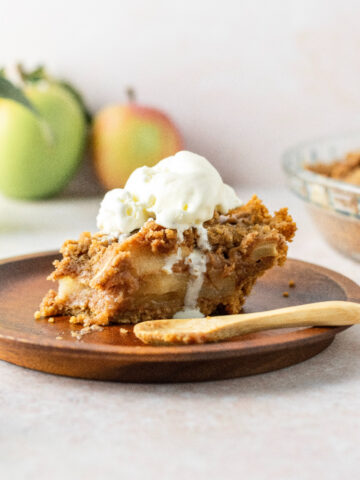
- Allow your pie to cool at room temperature for 3 hours. This lets the pie filling thicken up. Serve with your favorite sides like vanilla ice cream, whipped cream, or my favorite, chocolate ice cream. Cover and refrigerate any leftovers for up to five days.
If you made this recipe, please leave a comment and star rating below. I love hearing from you! Also, please tag me on Instagram and check out my Pinterest for even more recipe ideas.
It brings me so much joy to see you make my recipes. 🙂
Happy Baking!
More Pie Recipes

📖 Recipe
Homemade Apple Pie
Equipment
- 9-inch pie pan
- Food processor or pastry cutter
Ingredients:
Flaky All Butter Pie Crust
- 2 ½ cups all-purpose flour
- 1 teaspoon salt
- 1 cup unsalted butter, chilled and cubed
- 8-12 tablespoons ice water
Apple Pie Filling
- 5-6 apples, cored, peeled (optional), and sliced into ¼-inch slices (best to use two different types of apples, I used Honey Crisp and Granny Smith)
- 3 tablespoons lemon juice
- ¼ cup all-purpose flour
- 1 ½ teaspoons cinnamon
- ¼ teaspoon nutmeg
- ¼ teaspoon ginger
- ½ cup brown sugar
- ¼ cup sugar
- 1 teaspoon vanilla extract
- 1 egg white (used for egg white wash on top of pie dough)
Instructions:
Pie Crust
- Either in a bowl using a pastry cutter or a food processor (I used a food processor), combine flour and salt. Add the cubes of butter and press the pulse button on the food processor 4-6 times until the mixture resembles coarse crumbs (or use your pastry cutter).
- Add 2 tablespoon of ice water at a time, pulsing (or mixing with a wooden spoon) 2-3 times before adding 2 more tablespoons. The dough will start to feel slightly sticky and large clumps will form. That's when you know to stop adding the ice water. I add anywhere between 6-10 tbsp.
- On a lightly floured surface, press and fold the dough a few times until a ball starts to form. Cut the dough in half and flatten each piece into a disk shape. Wrap up in saran wrap and place both pie doughs into the refrigerator to chill for later.
Pie Filling
- Preheat the oven to 375 degrees. Core, peel (optional), and slice your apples into ¼ inch slices. In a large bowl, stir together the sliced apples, lemon juice, flour, cinnamon, nutmeg, ginger, brown sugar, sugar, and vanilla extract. Set aside.
- On a lightly floured surface, roll out one of the pie doughs, turning the dough slightly each time until a circle forms. We want about an 11 to 12-inch circle diameter. Place the dough into your 9-inch pie pan, carefully letting the excess pie dough hang over the sides (we will cut off later). Spoon the apple filling into the crust, leaving the extra juices in the bowl.
- Take the other pie dough out of the fridge and roll out into another 11 to 12-inch circle. Place the dough over the filling. With a small paring knife, carefully cut off the excess pie dough. Use either a fork or your fingers to seal the pie dough shut. Then cut little slits in the middle of the pie for the steam to vent out of when baking.
- Lightly brush the top of the pie dough with your egg white wash. Place pie pan onto a baking sheet and place it in the oven. Bake at 375 degrees for 20 minutes, then turn the temperature down to 350 degrees and bake for an additional 40-45 minutes.
- Allow your pie to cool at room temperature for 3 hours. This lets the pie filling thicken up. Serve with your favorite sides like vanilla ice cream, whipped cream, or my favorite, chocolate ice cream. Cover and refrigerate any leftovers for up to five days.


I love classic pie flavors, and this apple pie is in my rotation every fall season!